 Save
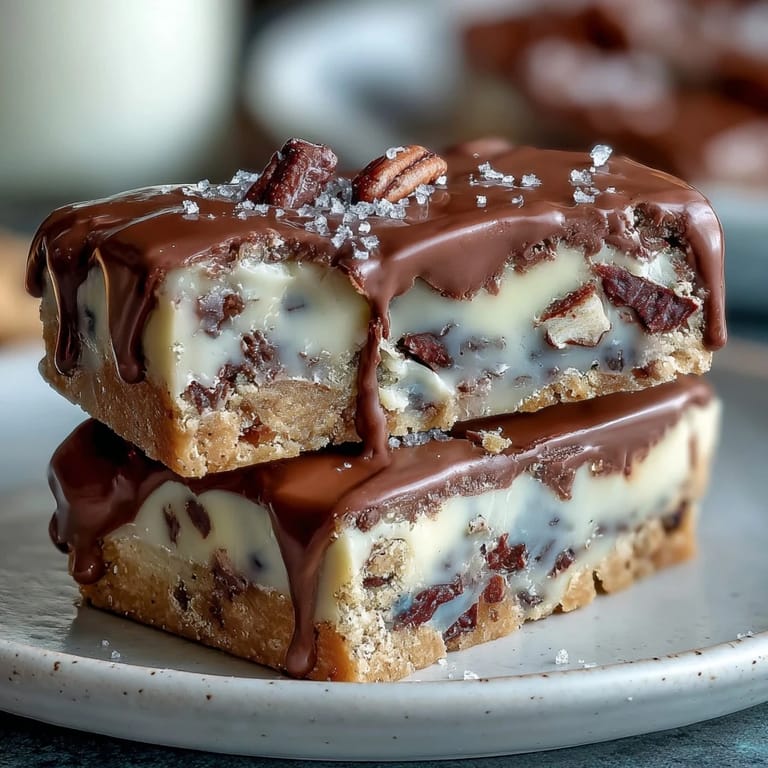
Save Last spring, I was tasked with bringing desserts to a graduation party for my neighbor's daughter, and I wanted something that felt celebratory without requiring me to frost two dozen individual cupcakes. These cookie bars came together almost by accident—I'd been craving that chewy, chocolate-studded texture of a good cookie but needed something you could cut into neat squares and arrange on a platter. The white chocolate drizzle felt like the perfect finishing touch, turning simple bars into something that looked like I'd spent hours in the kitchen when really I'd only spent forty minutes.
When I pulled that first batch from the oven, my kitchen smelled like a bakery—that warm, buttery chocolate aroma that makes everyone stop what they're doing. My daughter wandered in asking what I was making, and five minutes later she was helping me drizzle white chocolate across the top while they were still warm enough that the lines stayed perfect. Watching people at that party reach for a second piece without hesitation told me everything I needed to know about whether these were keepers.
Ingredients
- All-purpose flour (2 1/4 cups): This is your structure—it keeps the bars from spreading into thin, crispy cookies and gives them that satisfying chew.
- Baking soda (1 tsp): Just enough to help the bars rise slightly and brown at the edges without making them cake-like.
- Salt (1/2 tsp): This small amount makes the chocolate taste richer and balances the sweetness.
- Unsalted butter, melted (1 cup): Melting the butter first means you skip the creaming step entirely, which is why this recipe comes together so fast.
- Brown sugar and granulated sugar (1 cup plus 1/2 cup): The combination gives you depth of flavor and the right moisture level—brown sugar adds chewiness, white sugar adds slight crispness at the edges.
- Eggs (2 large): These bind everything and help create that tender crumb structure.
- Vanilla extract (2 tsp): Always use the real stuff if you can; it transforms the whole flavor profile into something unmistakably good.
- Semi-sweet chocolate chips (1 cup): The backbone of the flavor—don't skimp on quality here because you really taste them.
- Colored candy-coated chocolates (1/2 cup): Beyond being pretty, they add little pockets of candy sweetness and fun texture, though they can sink if you stir too vigorously.
- White chocolate (4 oz): Choose a brand you actually like eating because the drizzle is meant to shine; cheap white chocolate tastes waxy.
- Vegetable oil (1 tsp): This prevents the white chocolate from seizing and keeps it silky enough to drizzle smoothly.
Tired of Takeout? 🥡
Get 10 meals you can make faster than delivery arrives. Seriously.
One email. No spam. Unsubscribe anytime.
Instructions
- Set yourself up for success:
- Preheat your oven to 350°F and line your 9x13-inch pan with parchment paper, making sure some hangs over the edges—this is the trick that lets you lift the whole thing out later without wrestling with edges. This moment of preparation takes thirty seconds and saves you from frustrated scraping.
- Mix your dry team:
- In a medium bowl, whisk together the flour, baking soda, and salt until they're evenly distributed. There's no drama here; you're just making sure the leavening agent doesn't create any lumps.
- Build your wet base:
- In a large bowl, whisk the melted butter with both sugars until the mixture looks smooth and slightly lightened. Add your eggs and vanilla, whisking until everything is well combined and pale—this takes about a minute of actual whisking, not just a quick stir.
- Bring it together gently:
- Fold the dry ingredients into the wet mixture slowly, using a spatula to turn and combine until you can barely see any flour streaks. Stop there—overmixing makes bars tough, and you want them tender.
- Add your treasures:
- Stir in the chocolate chips and colored candies, being careful not to crush them. You want those little bursts of color and chocolate throughout.
- Spread and bake:
- Pour the dough into your prepared pan and spread it evenly using an offset spatula or the back of a spoon. Bake for 23 to 25 minutes, until the edges have turned a light golden brown and a toothpick in the center comes out with just a few moist crumbs clinging to it.
- Cool with patience:
- Let the bars cool completely in the pan on a wire rack before you do anything else. This is where most people fail—they try to frost or cut while they're warm and end up with a crumbly mess.
- Melt your white chocolate magic:
- Chop your white chocolate into pieces and add it to a microwave-safe bowl with the vegetable oil. Microwave in 20-second bursts, stirring between each one, until it's completely smooth and pourable.
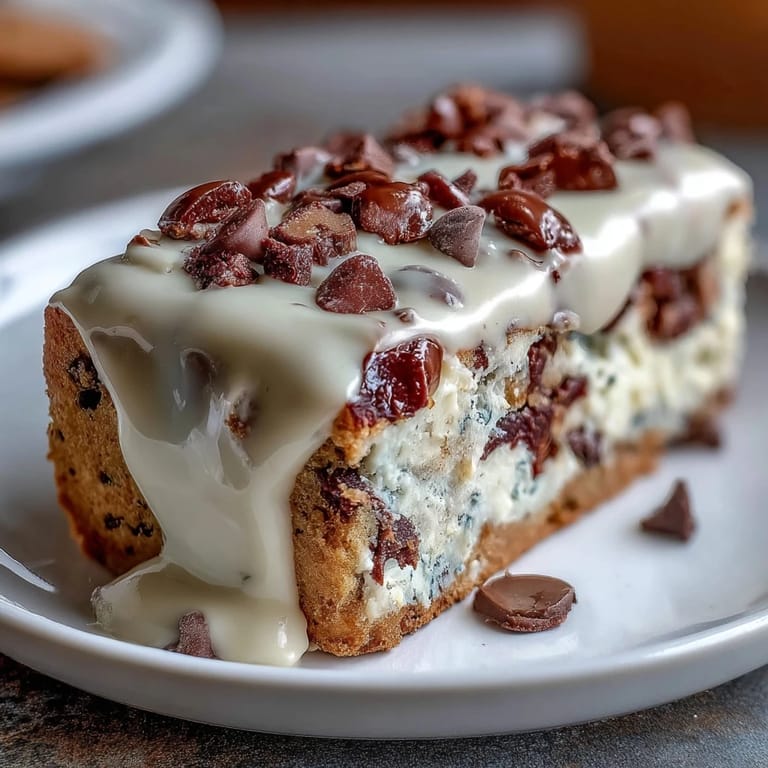
- Drizzle and decorate:
- Using a spoon or piping bag, drizzle the white chocolate across the cooled bars in whatever pattern makes you happy. If you're feeling fancy, add colored sprinkles while the chocolate is still wet so they stick.
- Set and slice:
- Let the white chocolate drizzle harden completely—about an hour at room temperature—before cutting into 16 squares. Use parchment paper overhang to lift the entire block out of the pan, then cut with a sharp knife.
 Save
Save What stuck with me most wasn't the compliments, though there were plenty, but watching a group of graduates sitting on the porch with these bars in hand, too busy enjoying them to even notice what they were eating. There's something special about making something that becomes a small, delicious part of someone's memory of a big moment in their life.
The Secret to Golden Edges
The magic happens in those last few minutes of baking when the edges turn golden and the center is still slightly soft. I've found that pulling them out right when the toothpick test shows just a few moist crumbs is the exact moment before they tip from chewy into dry. Every oven runs different, so start checking at 23 minutes and don't be afraid to add another minute if needed.
Why Colored Candies Matter Beyond Just Looking Pretty
Beyond the visual appeal of school colors, these candies add little pockets of sweetness and a different texture that chocolate chips alone can't give you. They also stay whole longer than you'd expect, surviving the baking process with their candy shells intact if you don't stir them in too aggressively. The sugar coating on them actually enhances the overall sweetness profile, which is why removing them and replacing with plain chocolate chips noticeably changes how the bars taste.
Storage and Customization for Any Celebration
These bars keep beautifully in an airtight container at room temperature for up to four days, which makes them perfect for preparing ahead before an event. You can adapt them endlessly—swap milk chocolate for semi-sweet, use different colored candies to match a wedding or birthday theme, or skip the white chocolate drizzle entirely for a more rustic look. The base recipe is forgiving enough that these little adjustments never feel like you're experimenting; they feel like you're making them intentionally your own.
- Store in layers separated by parchment paper so they don't stick together.
- If the white chocolate drizzle cracks during transport, warm them gently and re-drizzle before serving.
- Make these up to two days ahead and add the white chocolate drizzle the morning of your event for the freshest appearance.
 Save
Save These graduation cookie bars turned into my go-to celebration dessert because they're as easy to make as they are beautiful to look at. Every time someone asks for the recipe, I'm reminded that the best dishes are the ones that taste like celebration and generosity on a plate.
Recipe FAQ
- → What kind of chocolate works best for the drizzle?
White chocolate chips or chopped white chocolate combined with a bit of vegetable oil melt smoothly for an even drizzle.
- → Can I substitute the colored candies with other mix-ins?
Yes, you can use dark or milk chocolate chips, nuts, or sprinkles to customize the bars to your taste.
- → How do I know when the bars are fully baked?
Bake until the edges turn light golden and a toothpick inserted in the center comes out mostly clean with a few moist crumbs.
- → What is the best way to prevent these bars from sticking to the pan?
Line the baking pan with parchment paper, leaving an overhang to easily lift the bars out after cooling.
- → How should I store the bars to keep them fresh?
Keep the bars in an airtight container at room temperature for up to 4 days to maintain freshness and texture.