 Save
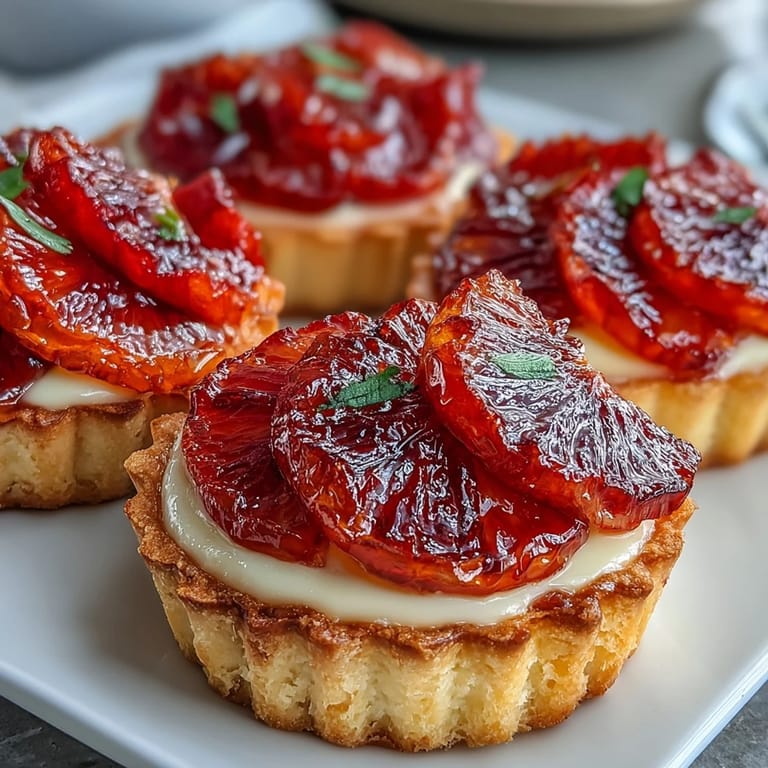
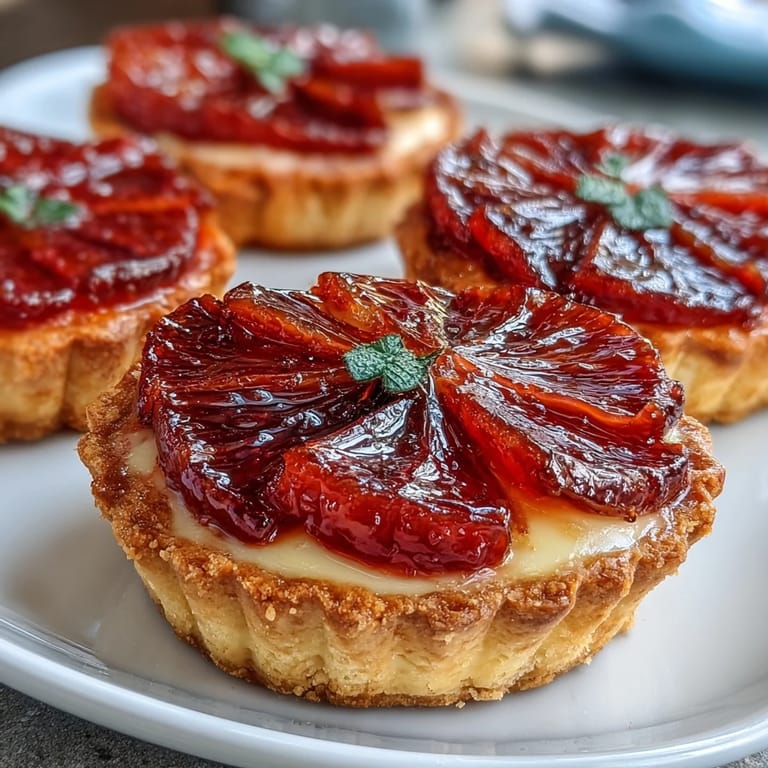
Save I was flipping through a borrowed French cookbook one rainy afternoon when the photograph of blood orange tarts stopped me cold. The color alone—those deep crimson wheels against pale custard—felt like something worth chasing. I had never worked with blood oranges before, but the next morning I found myself at the market, hunting down the most jewel-toned ones I could find. That first batch turned out lopsided and the custard split slightly, but when I sliced into one, the balance of buttery crust, silky vanilla, and sharp citrus made every mistake feel like a lesson worth learning.
I made these for a small dinner party last winter, and I still remember the silence that fell when I brought them to the table. One friend, who usually picks at dessert, ate hers in four bites and asked if I had another hidden somewhere. The tarts had chilled just enough that the custard held its shape under the fork, and the blood orange slices released their juice with each cut. It was one of those rare moments when a dessert does exactly what you hoped it would, and everyone notices.
Ingredients
- All-purpose flour: The foundation of the tart shell; I learned to handle it lightly to avoid tough dough, and chilling before rolling makes all the difference.
- Powdered sugar: Adds a delicate sweetness and helps the dough stay tender instead of chewy.
- Unsalted butter, cold and cubed: Cold butter creates flakiness; I keep mine in the freezer for 10 minutes before pulsing.
- Egg yolk: Binds the dough without adding too much moisture, and I always save the white for an omelet the next day.
- Ice water: Use only as much as you need; too much makes the dough sticky and hard to handle.
- Whole milk: The custard base; whole milk gives the richness that skim just cant deliver.
- Granulated sugar: Sweetens the custard without overpowering the vanilla or the citrus that comes later.
- Egg yolks: These thicken the custard and give it that luxurious, pale yellow color.
- Cornstarch: A little insurance against curdling; it stabilizes the custard and makes whisking less stressful.
- Pure vanilla extract: I use the real stuff here because it blooms in warm custard and fills the kitchen with a smell that makes you want to stay close.
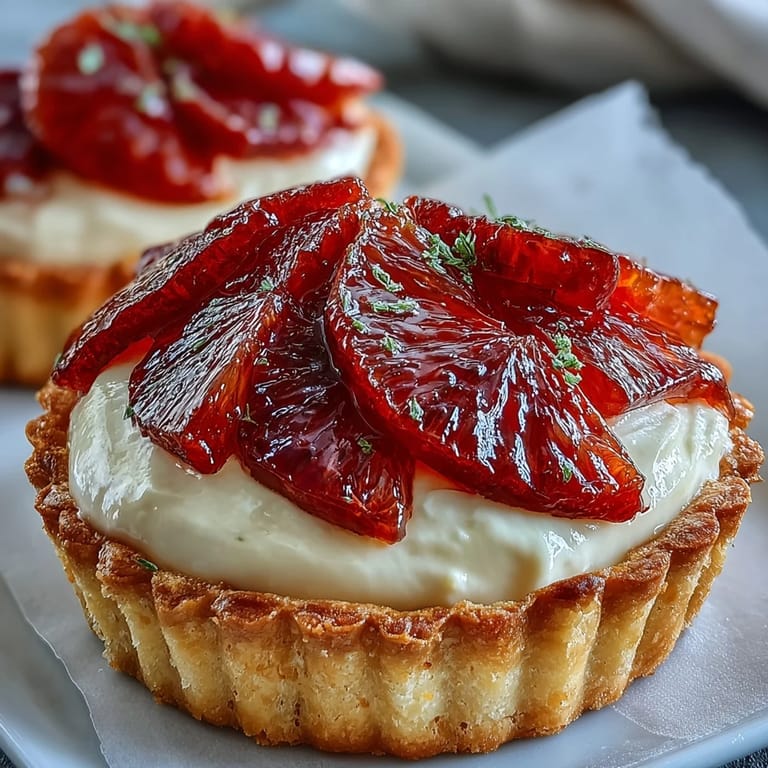
- Blood oranges: The star; pick firm ones with deep color, and slice them as thin as you can manage for the prettiest arrangement.
- Honey (optional): A quick brush of warm honey gives the oranges a glossy finish and a hint of floral sweetness.
Tired of Takeout? 🥡
Get 10 meals you can make faster than delivery arrives. Seriously.
One email. No spam. Unsubscribe anytime.
Instructions
- Make the tart dough:
- Pulse flour, powdered sugar, and salt in a food processor, then add cold butter until the mixture looks like wet sand. Add the egg yolk and drizzle in ice water just until the dough begins to clump together, stopping before it turns into a ball.
- Chill the dough:
- Press the dough into a flat disk, wrap it tightly in plastic, and let it rest in the fridge for at least an hour. This step is non-negotiable; it prevents shrinking and makes rolling so much easier.
- Roll and shape:
- On a floured surface, roll the dough to about 1/8-inch thickness, turning it often to keep it from sticking. Cut circles to fit your tart pans, press gently into the edges, and trim the overhang with a knife.
- Blind bake the shells:
- Chill the shaped shells for 20 minutes, then line them with parchment and pie weights and bake at 350°F for 15 minutes. Remove the weights and bake another 5 minutes until the edges turn golden and the bottoms look dry.
- Cook the custard:
- Heat the milk until it steams, then whisk it slowly into the egg yolk mixture to temper it without scrambling. Return everything to the pan and whisk constantly over medium heat until it thickens and bubbles, about 2 to 3 minutes.
- Cool and chill:
- Stir in vanilla and butter, then press plastic wrap directly onto the surface of the custard to prevent a skin. Let it cool to room temperature, then chill for at least an hour.
- Assemble the tarts:
- Spoon the cold custard into the baked shells, smoothing the tops gently. Arrange thin blood orange slices in overlapping circles, pressing them lightly into the custard so they stay put.
- Glaze and serve:
- If you want a glossy finish, warm honey with a teaspoon of water and brush it over the oranges. Chill the finished tarts until you are ready to serve, and handle them gently when plating.
 Save
Save The best part of these tarts is not just how they taste, but how they make people pause. I have watched friends pick up their forks and then set them down again just to look at the colors one more time. There is something about the honesty of a tart—no towering layers, no distractions—that lets each element speak clearly. When the custard is smooth, the crust is crisp, and the blood oranges are at their peak, the tart does not need anything else.
Choosing Your Blood Oranges
Not all blood oranges are created equal, and I have learned to look for ones that feel heavy for their size, which usually means they are juicy. The skin should have a blush of red, though the deepest color is always hiding inside. If you can only find regular oranges, the tarts will still be beautiful, but you will miss that slightly bitter edge that makes blood oranges so striking. I like to slice a test orange first to see how the color looks before committing to the whole batch.
Make-Ahead Strategy
These tarts are ideal for entertaining because you can bake the shells and make the custard a day ahead, storing them separately in the fridge. I assemble them a few hours before serving so the crust stays crisp and the oranges look fresh. If you glaze them too early, the honey can make the fruit weep a little, so I usually wait until the last possible moment. The whole process feels less frantic when you break it into stages, and the tarts taste just as good as if you had done everything in one marathon session.
Serving and Storing
I serve these tarts cold, straight from the fridge, because the contrast between the chilled custard and the bright citrus is part of the appeal. They pair beautifully with a glass of sparkling rosé or a late-harvest dessert wine, though honestly they are just as good with black coffee in the afternoon. If you have leftovers, cover them loosely with plastic wrap and keep them in the fridge for up to two days, though the crust will soften slightly over time.
- Use a sharp knife dipped in hot water to slice the blood oranges evenly and avoid tearing the flesh.
- If your custard looks too thick after chilling, whisk in a tablespoon of cold milk to loosen it before filling the shells.
- Let the baked tart shells cool completely before adding custard, or the warmth will make everything slide around.
 Save
Save Every time I make these tarts, I am reminded that some recipes are worth the extra steps. The look on someone's face when they taste the combination of buttery crust, smooth custard, and tart citrus makes the effort feel small in comparison.
Recipe FAQ
- → Can I make these tarts ahead of time?
Yes, you can prepare the tart shells and custard up to a day in advance. Store them separately in the refrigerator and assemble with fresh blood orange slices just before serving to maintain the best texture and presentation.
- → What if I can't find blood oranges?
Regular oranges, cara cara oranges, or even grapefruit work beautifully as substitutes. While you'll lose the dramatic red color, the flavor and texture will still be excellent.
- → How do I prevent the tart shells from shrinking?
Chilling the dough both after forming the disk and after pressing it into the pans is crucial. This relaxes the gluten and helps maintain the shell's shape during baking. Using pie weights also prevents puffing and shrinking.
- → Can I use a different type of citrus?
Absolutely. Meyer lemons, tangerines, or clementines all work well. Adjust the honey glaze based on the sweetness of your chosen citrus to balance the flavors.
- → How long will these tarts keep?
Once assembled, the tarts are best enjoyed within 4-6 hours for optimal texture. The custard and shells can be stored separately for up to 2 days before assembly.
- → Do I need special tart pans?
While individual 4-inch tart pans with removable bottoms work best for presentation, you can use a single 9-inch tart pan or even muffin tins as alternatives. Adjust baking time accordingly.